Today we will Learn How to Add & Change Fonts in WordPress Posts & Pages . Fonts is a important element for website especially when writing a post on technology, health, stocks, sport or news.
using a right fonts style give good reading experience for visitor, and choosing a bad fonts can drive viewer away, don’t choose bulky or hard to reading fonts style even you like it because you are writing a post for viewer not for yourself, always choose simple but stylish fonts style which give viewer a good reading experience.
So, in this article I will shows you how to add fonts plug-in for WordPress websites and how to use and apply it, please follow the below steps.
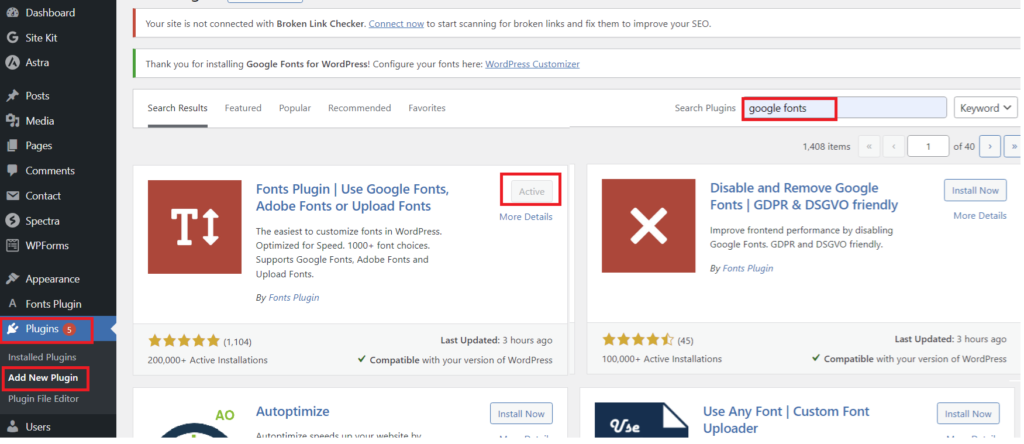
1.To add a fonts “plug-in” sign-in into WordPress, extend the “Plug-Ins” click on “Add new Plugins” in the search box type “google fonts” you may get lot of font plug-in but my favourite is “Fonts plugin | Use Google Fonts…” after you search it click on “Install now” and after installed complete click on “Active”.
2. After font plugin install successfully, now its time to apply it, to change the fonts style of your post or page click or extend “Appearance” select “Customize” click on “Font Plugin” you will get basic setting and advanced setting in the basic setting you can simply change the fonts style for entire post, but in the advanced setting you will get option to change fonts for content and Headings.
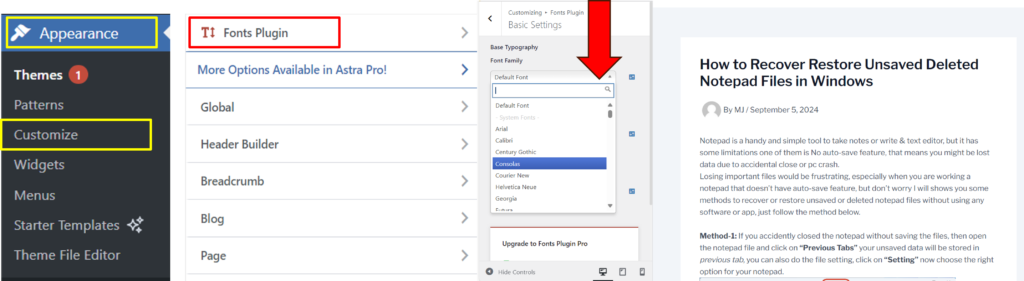
3. To apply your favorite fonts style, open your post or page then click on “Fonts plugin” now click on basic or advanced settings, choose your fonts and that’s it.
Let me know in comment which method fixed your issue, if you are still facing issue than please write your issue in the comment box…
Read More:-